Easy Way to Add Brush to Multiple Objects Illustrator
Large files can significantly slow down your workflow. Editing, zooming of the screen and just saving the file may take several minutes. In addition, large file sizes are often the reason of application crashes resulting in the loss of all or part of the work. Using the autosaving feature of Autosaviour plugin will help you avoid such losses, but does not eliminate the loss of time during the next saving of a large file. Therefore it is important to know how to reduce the file size for ease of use with the minimum of delay. In this article, you will learn about 9 ways of minimizing the source vector file.
1. Save options
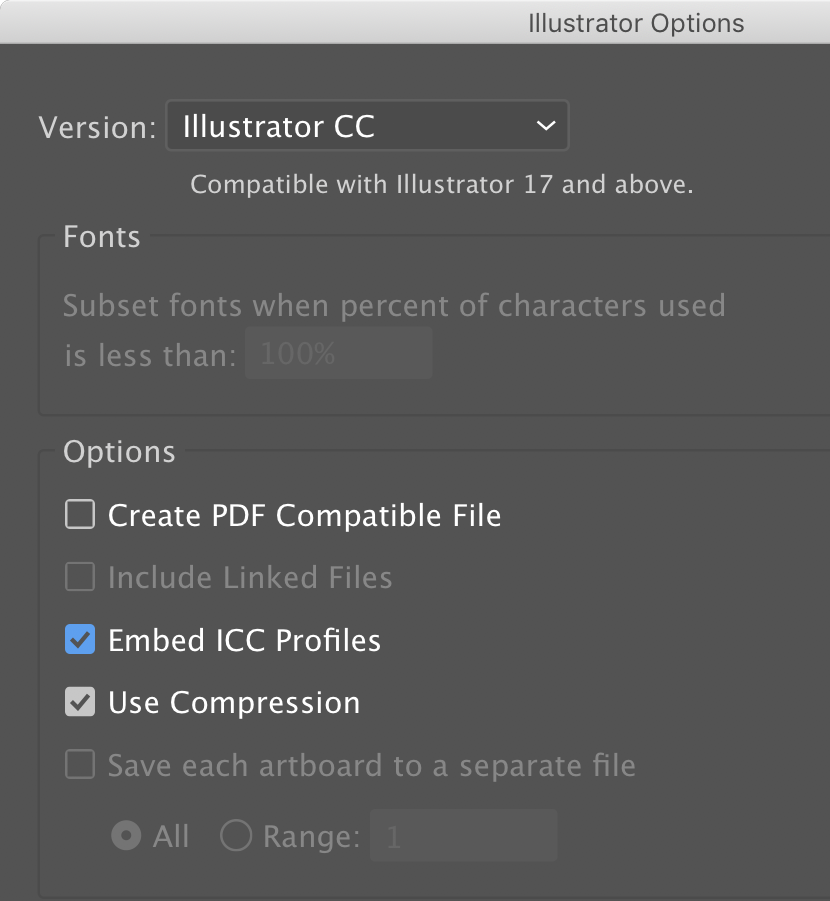
When we are saving the file for the first time (File > Save… or File > Save As…) this opens Illustrator's options dialog box. To significantly reduce the file size, untick Create PDF Compatible File and tickUse Compression.
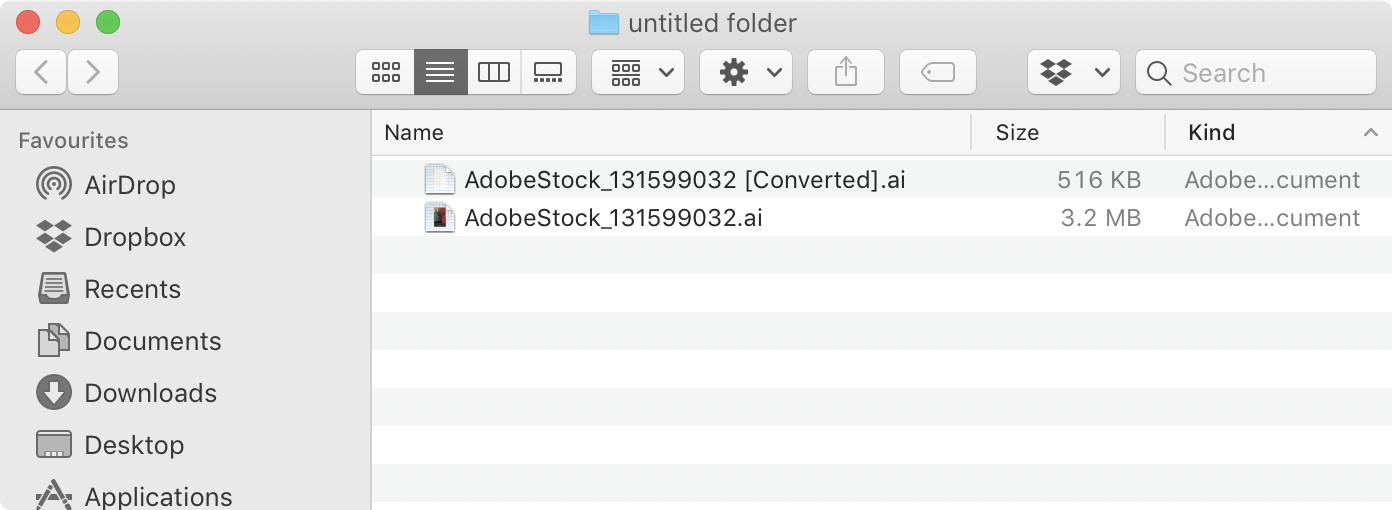
Such selection of options reduces the file size significantly. In the example we experimented on a complex vector stock image.

Using theCreate PDF Compatible File option may be required in some areas of design. In this case, select it during the last save (File > Save As…), when the work will be completely ready. AlsoCreate PDF Compatible File option will help you recover Illustrator files after a crash. However, this recovery is not necessary if you use Autosaviour plugin, which can create a backup copy of the file.
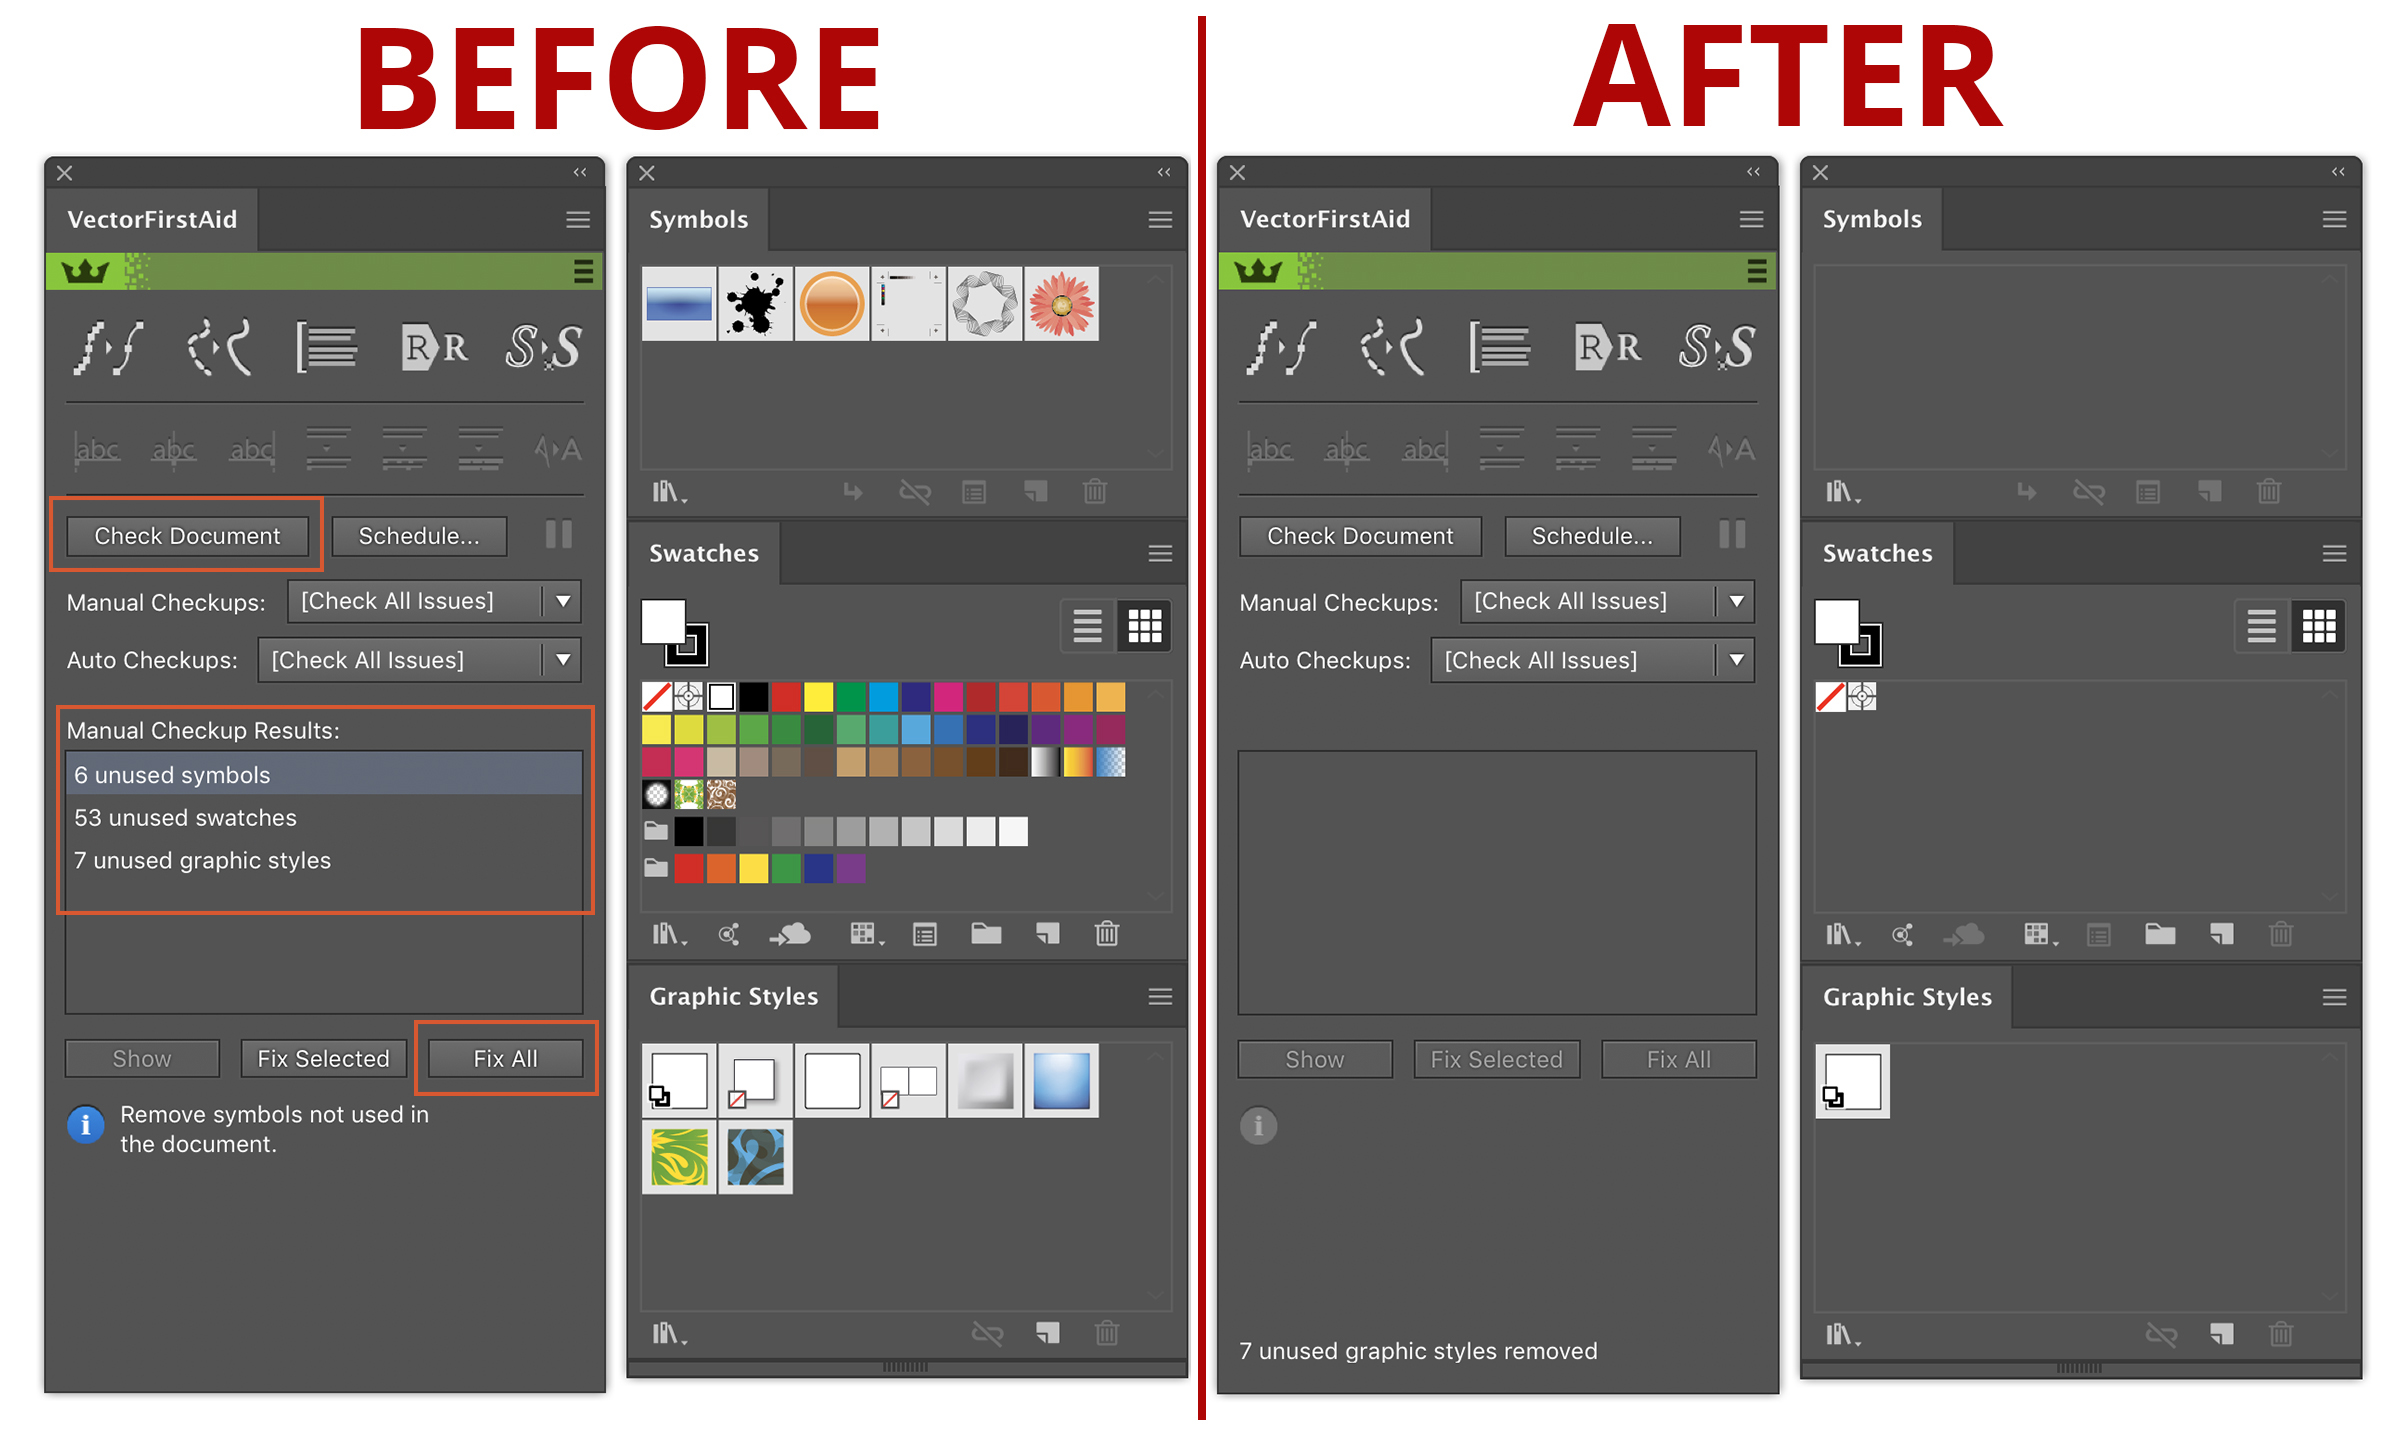
2. Deleting unused Swatches, Graphic Styles and Symbols
Every time you create a new document it's more than likely you'll have an array of default swatches, styles and symbols and not only do they make your file bigger but they also clutter up your panels. To clean them up is easy using VectorFirstAid. Firstly open the panel by going toWindow > VectorFirstAid > VectorFirstAid Panel. On the panel clickCheck Documentthen pressFix All to fix everything that appears in the results box (you can also fix each result individually by selecting it then clickingFix Selected). You can even assign this to an action or schedule it through the VectorFirstAid panel.
3. Using linked images
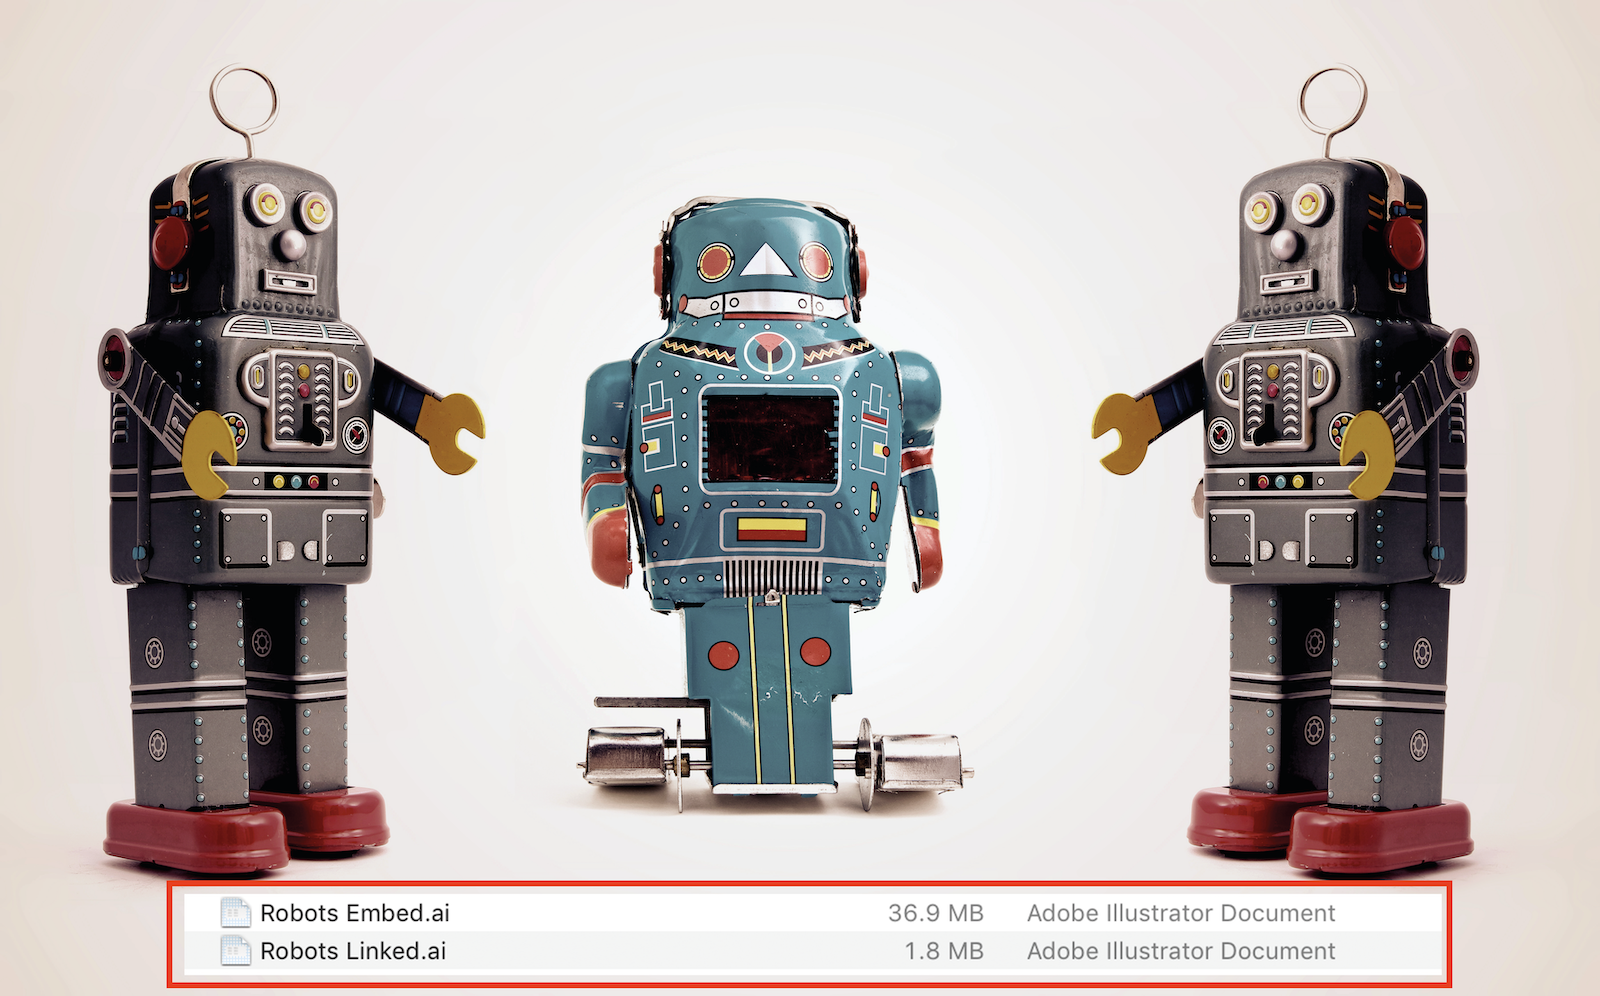
Along with vector objects, your artwork may also contain raster images. You can place them in the document or they can be the result of certain processes. For example, raster effects after theExpand Appearance command convert into raster images. Any raster graphic in your Illustrator document can be of two types:Linked Images orEmbedded Images. Using theLinked Images only can greatly reduce the file size, especially when dealing with large images of high resolution. For example, the file containing the linked image of these robot toys has a size of36.9MB. If you embed this image in a document, the file size after saving will be36.9MB.
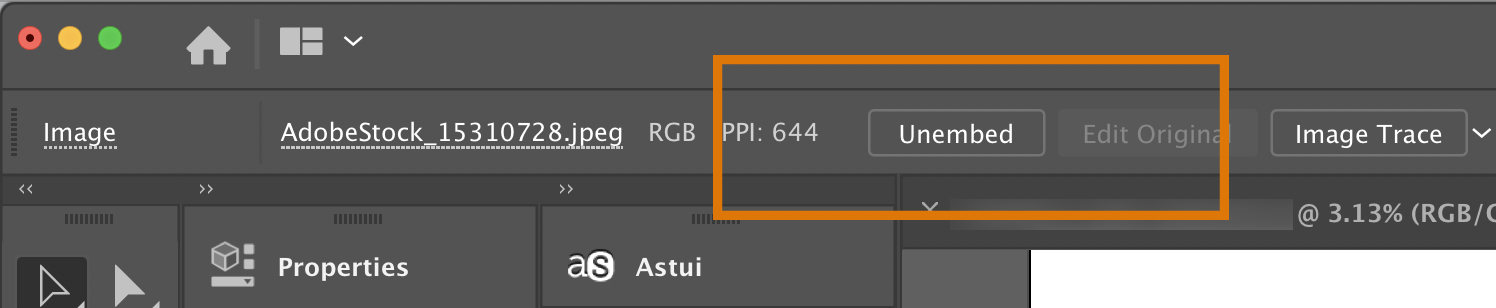
Your file may already containEmbedded Images. In this case, you can relink them by clicking Unembed in the Control panel or hit Relink icon in the Links panel (Window > Links). One fo the main benefits of Rasterino is the ability to unembed multiple images in one go.
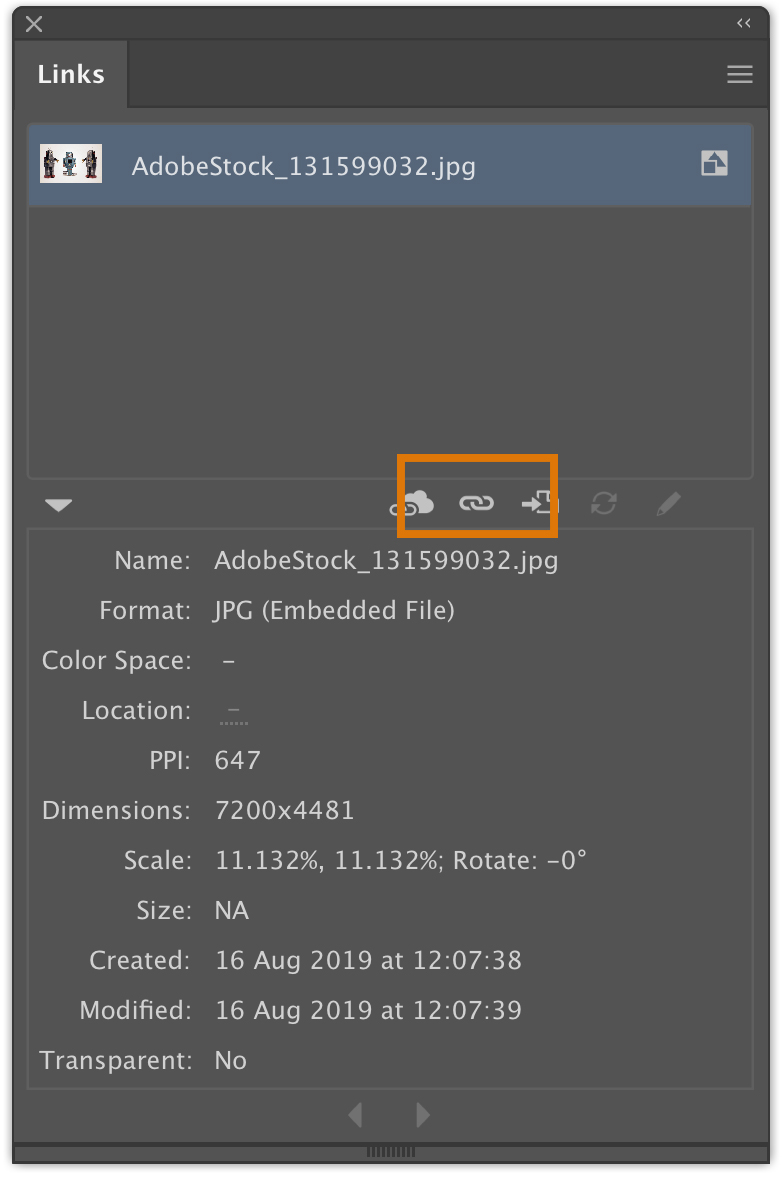
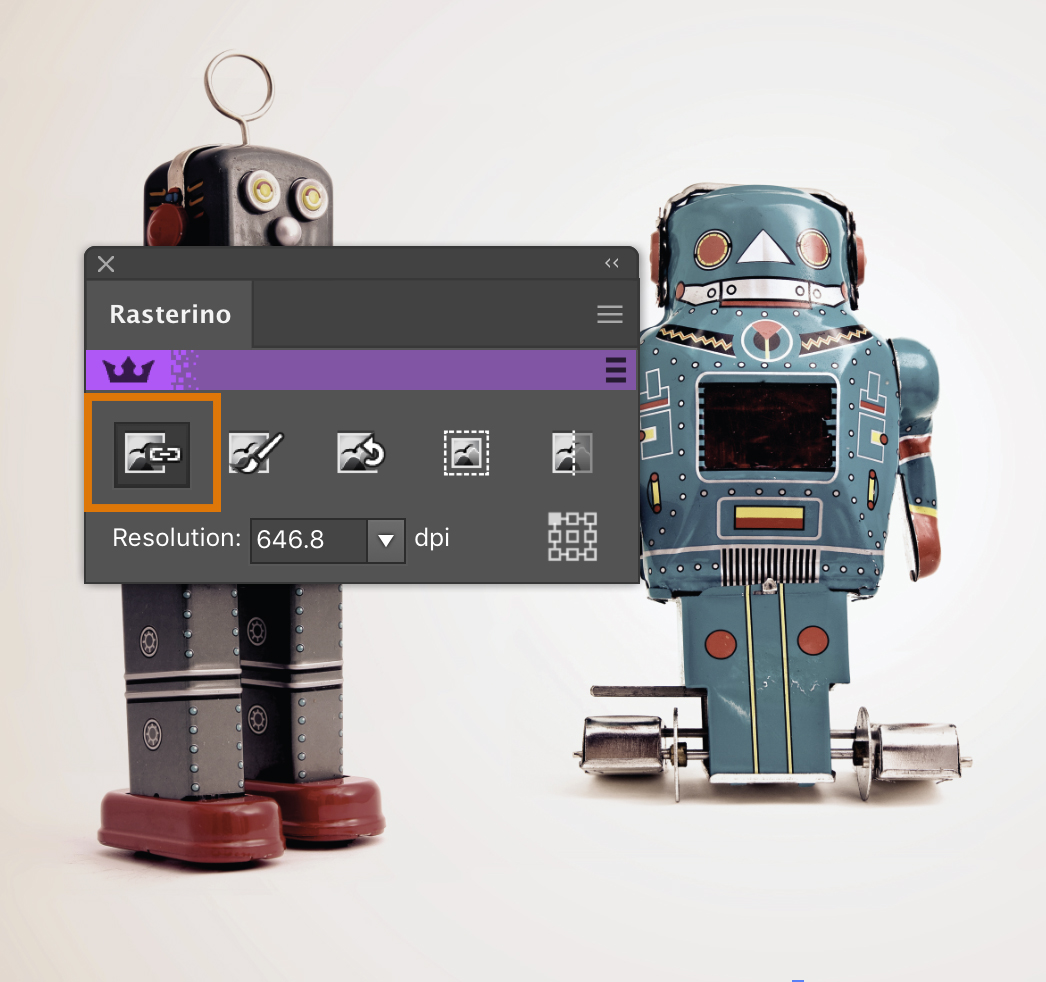
Please note that the Relink option is only available to users of Adobe Illustrator CC. If you are working in earlier releases of the application, you can use Rasterino plugin, which has a similar function – Link Images.
4. Cropping of unneeded embedded image data
In cases where we still need to use embedded images, we can delete an unneeded part of an image using Rasterino. If the image has a background that includes transparent or white pixels, then we can remove them by clicking theTrim Image button in the Rasterino panel (Window > Rasterino > Rasterino panel). After selecting the desired options in the dialog box, Rasterino will delete parts of the image that have no significant information.
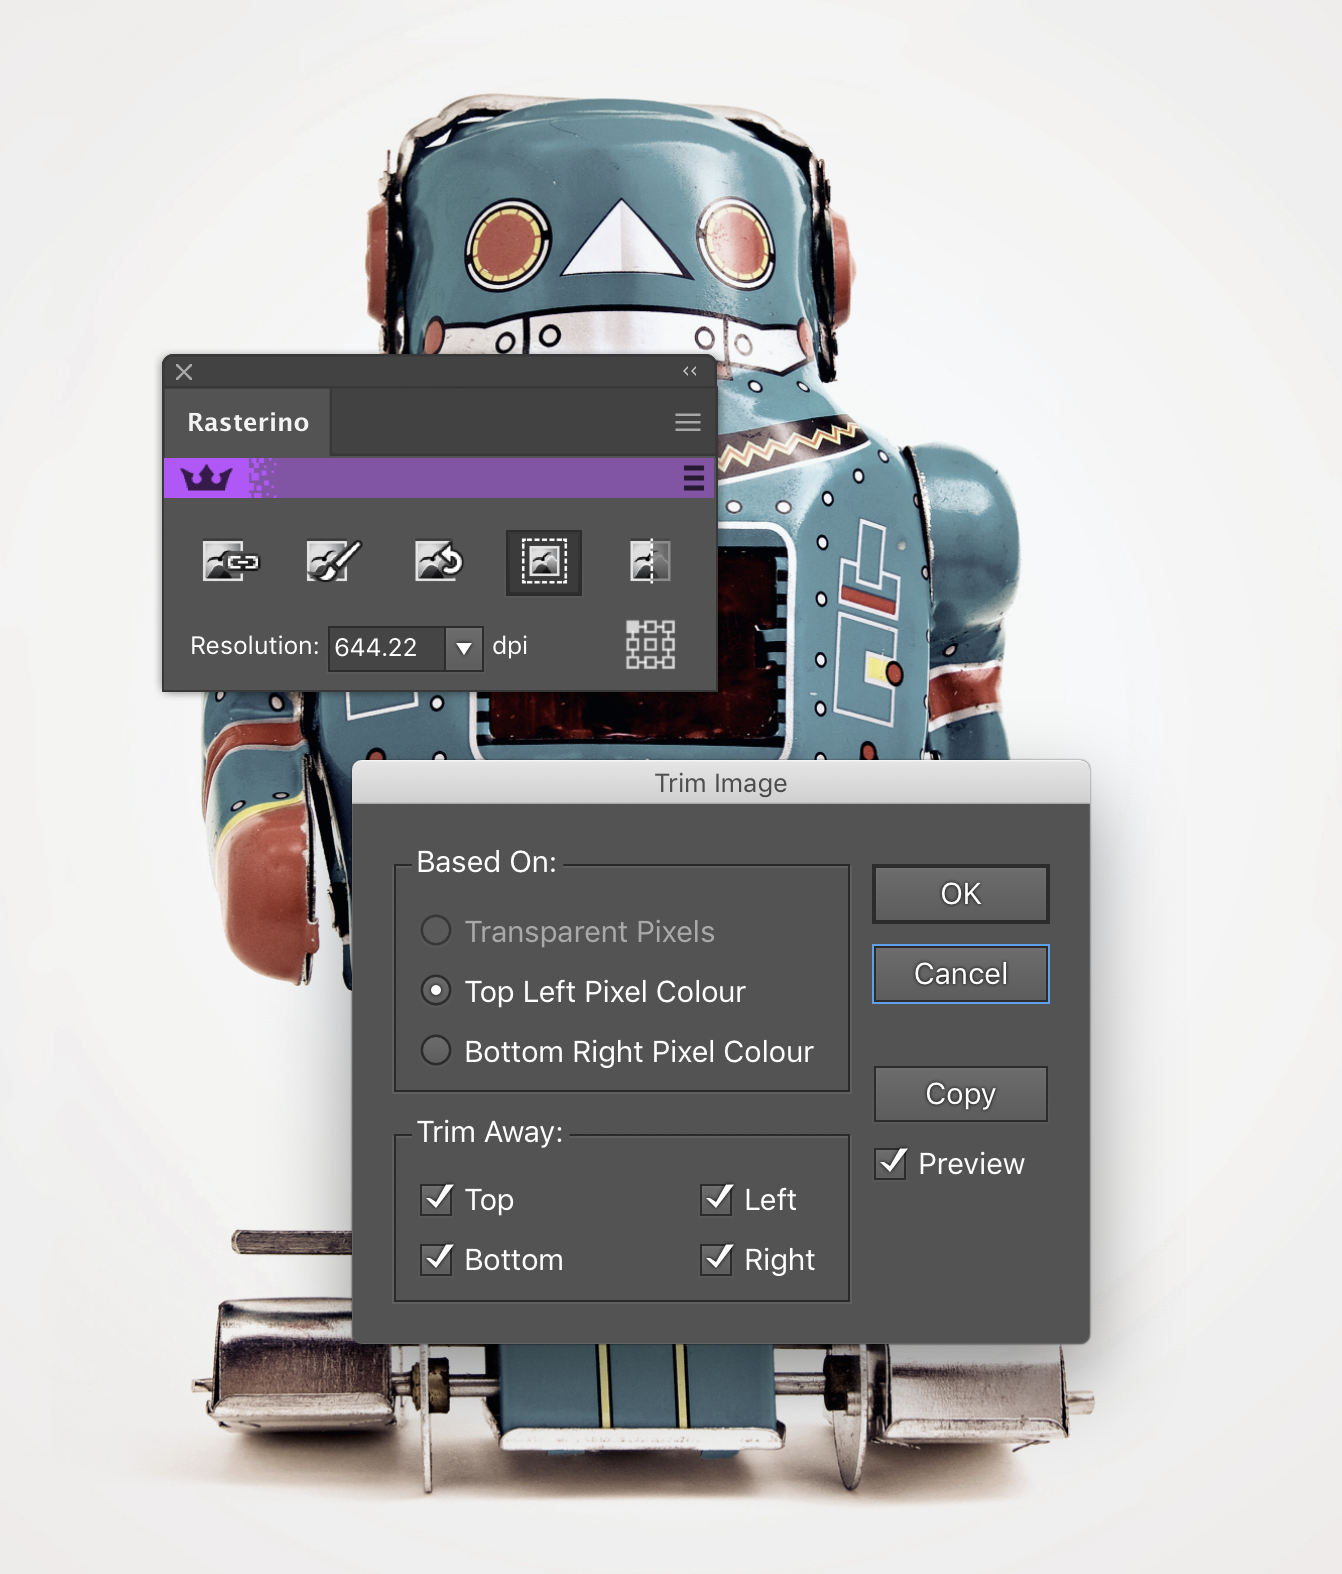
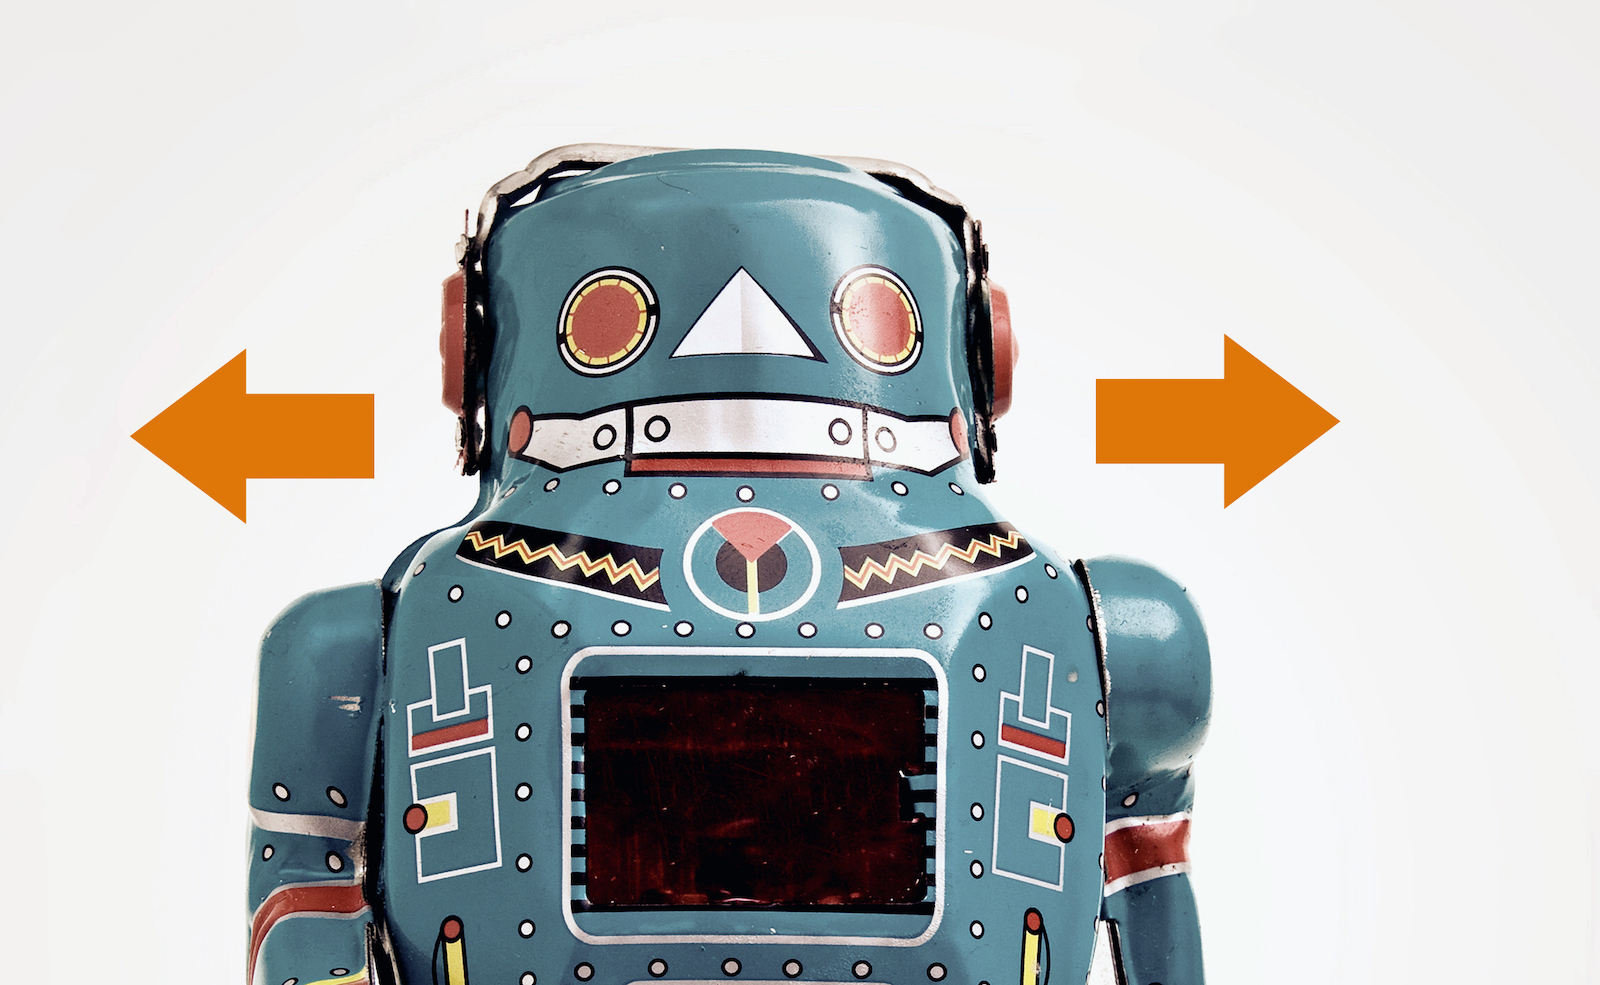
We can also crop the image by selecting the necessary part, using the Crop Image Tool of Rasterino or using the Crop Image button in the Rasterino panel.
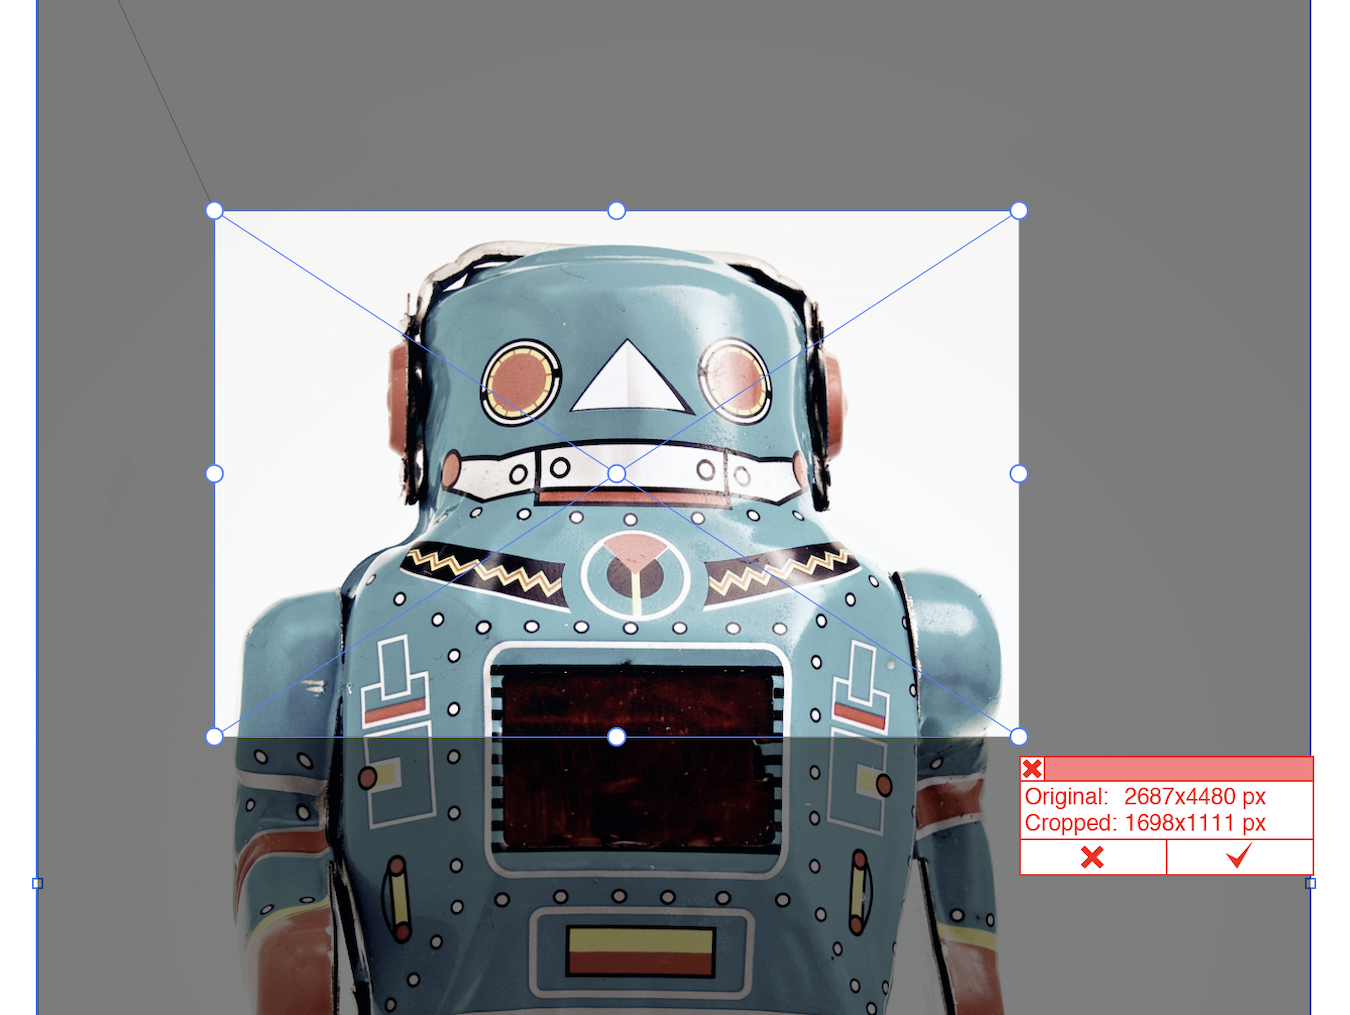
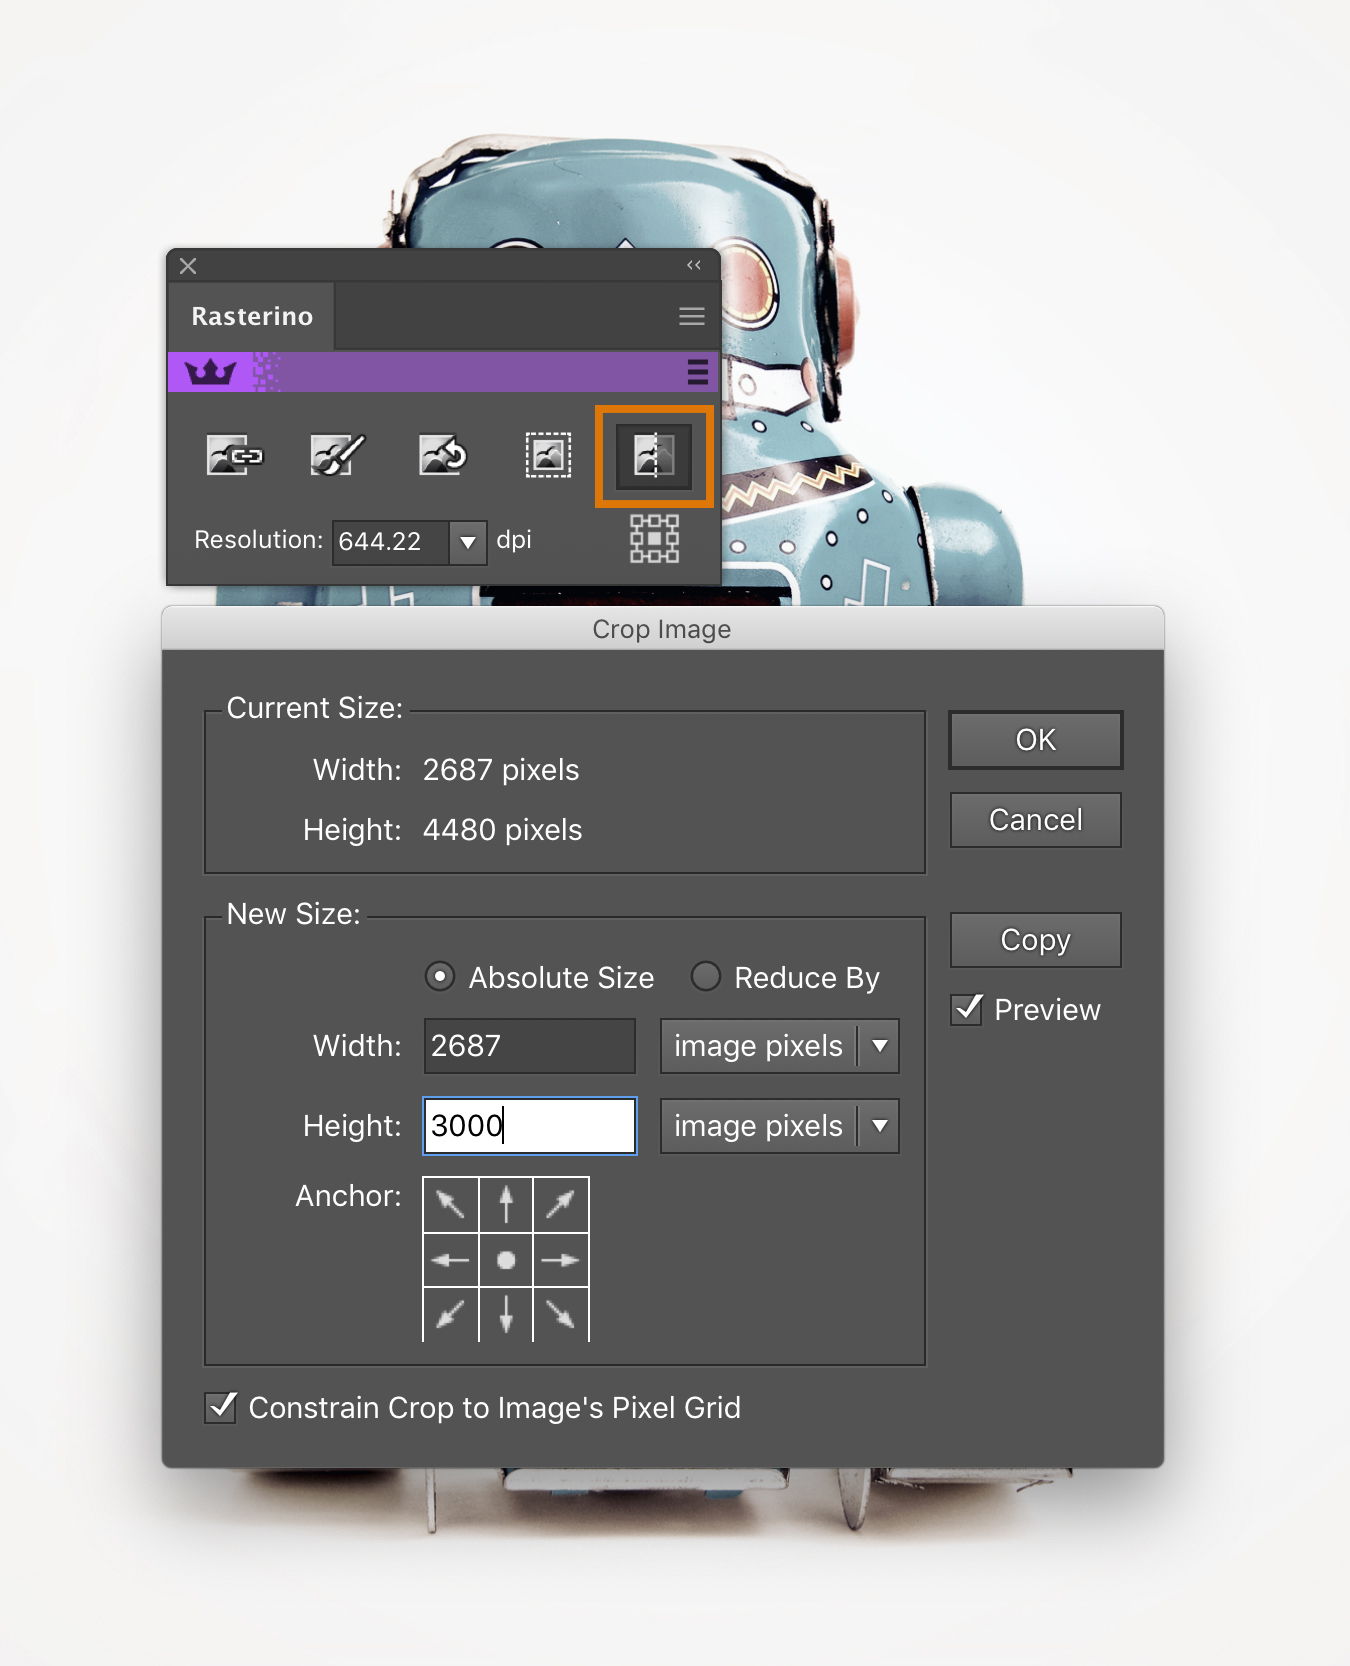
No doubt that cropping part of an embedded image will reduce the size of the entire file
5. Reducing the resolution of Raster Effects
You can reduce the resolution of all raster effects, which have been applied in the current document. To do this, go toEffect > Document Raster Effects Settings and setting a low value for the resolution in the dialog box.
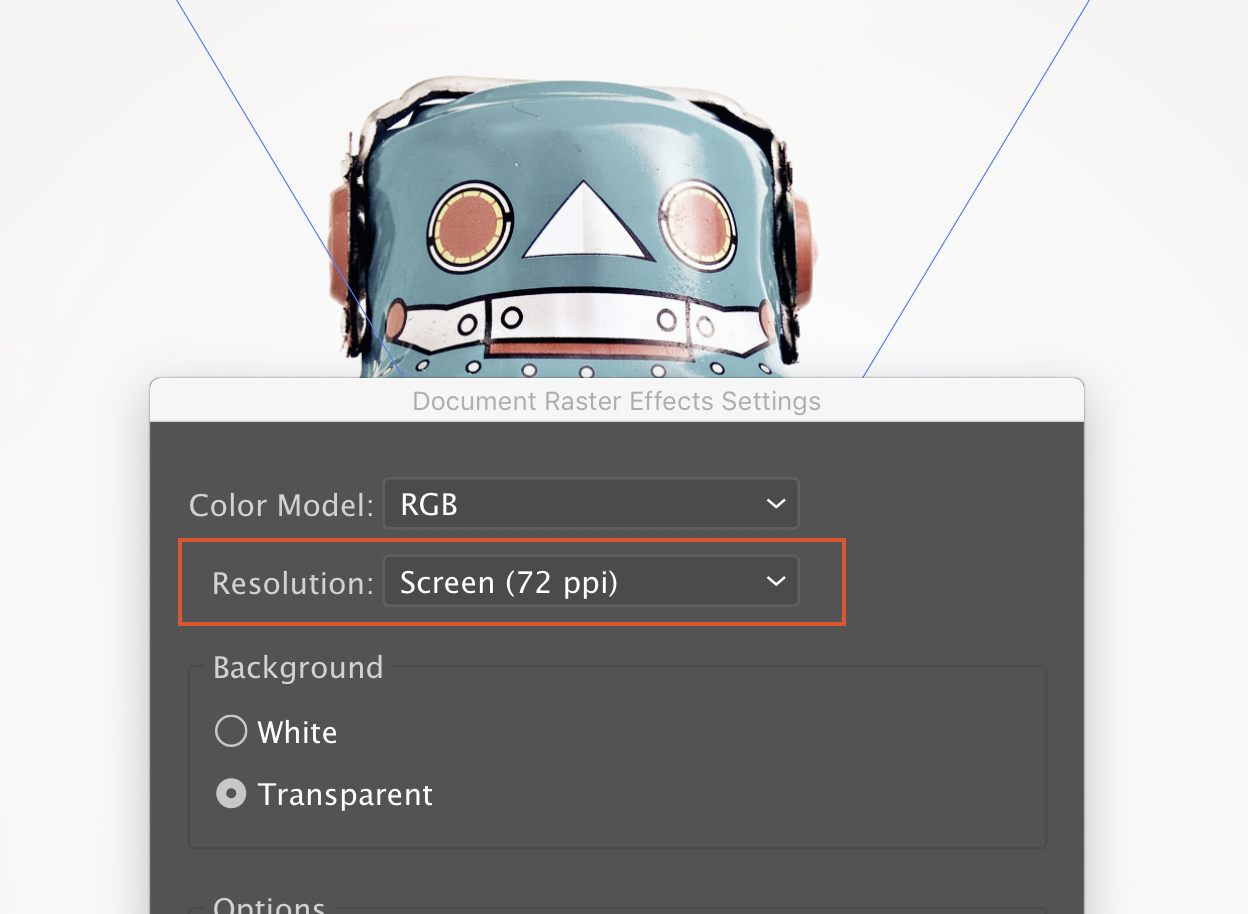
In addition to minimizing the file size, it will also accelerate the process of displaying graphics on the screen while zooming. After finishing with the file you can set the desired value for the resolution.
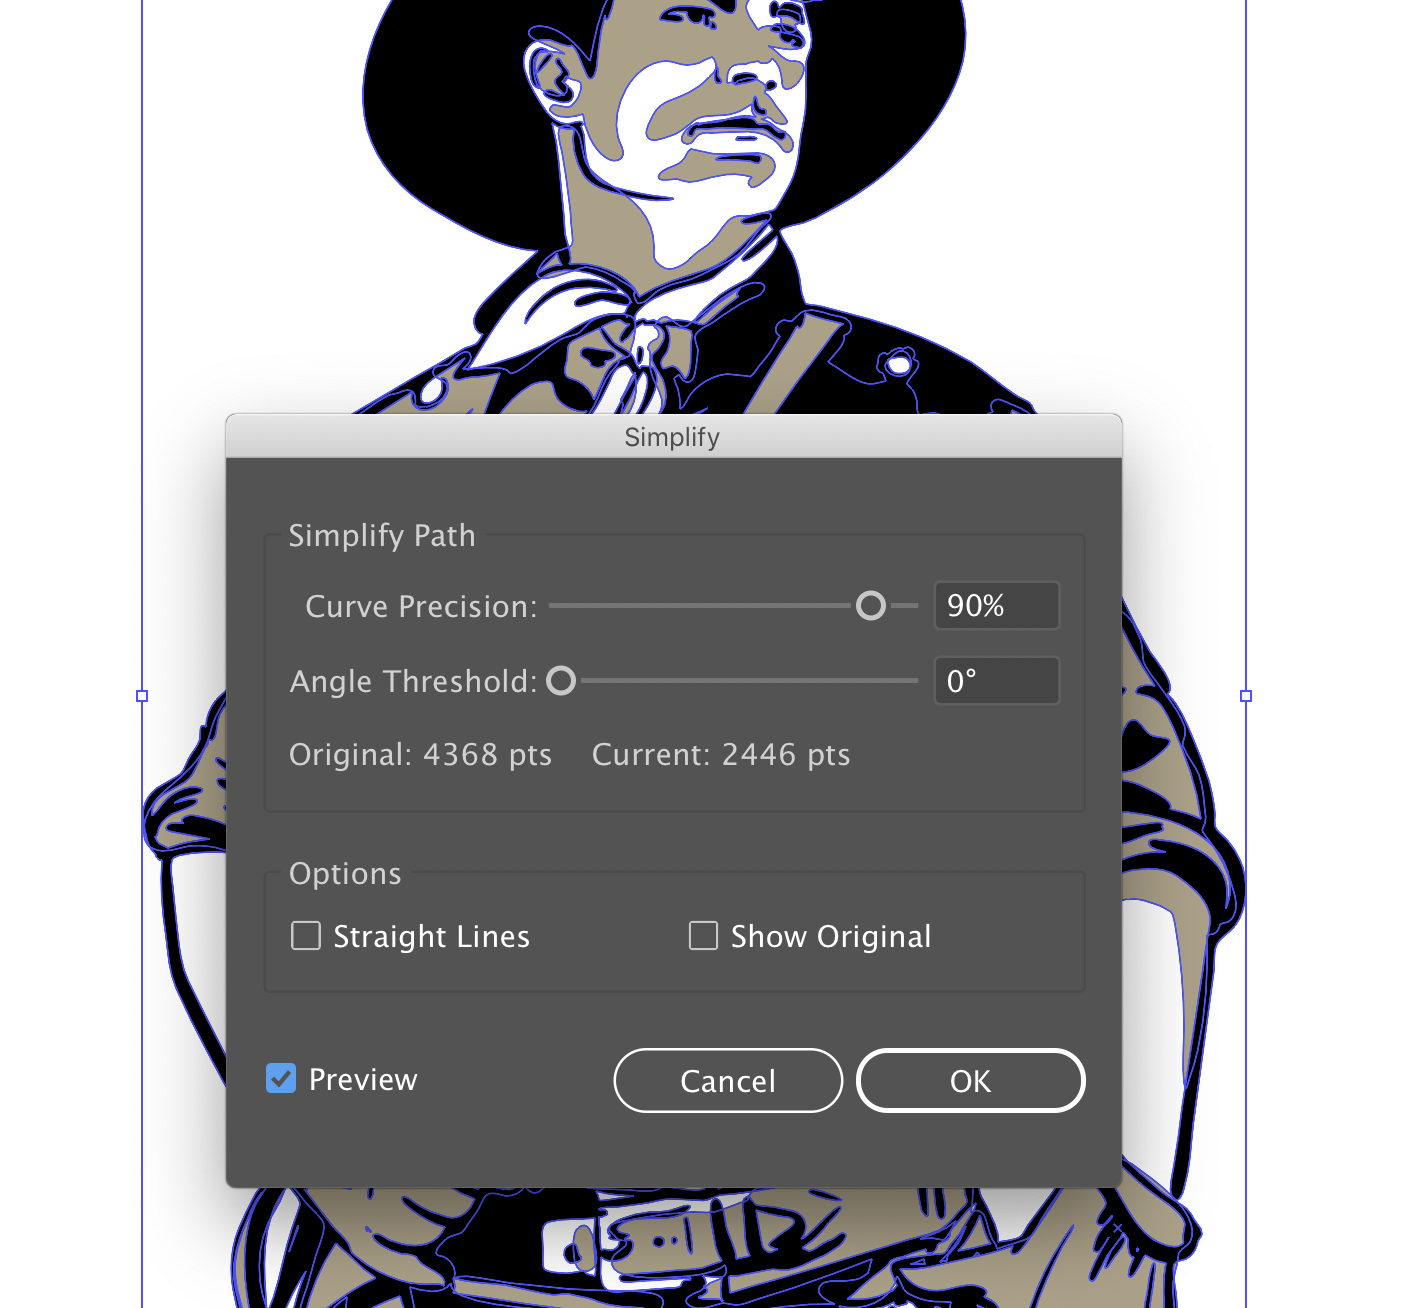
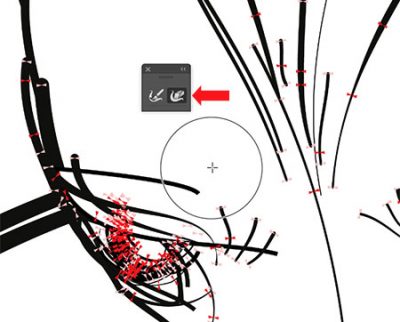
6. Removing excess points
The number of anchor points also affects the size of your file. The number can be reduced by using the native Illustrator's feature – Simplify (Object > Path > Simplify). This feature is good to use for rough processing of the paths, such as reducing the number of points of vector textures when there is no need to maintain the shape of objects but can significantly change the shape of the image including items of detail that may be required.
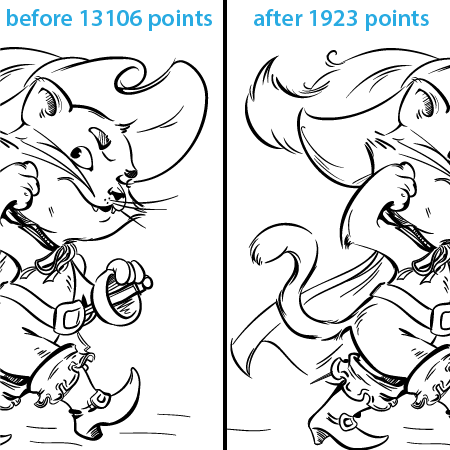
However, a better option is to use the VectorFirstAid plugin as we can clean-up excess points whilst maintaining precision by using theSuper Smart Remove (also available in VectorScribe) points on paths button located on the panel. This will reduce the number of points in your entire document or selection to a set tolerance that can be changed in the panels preferences.
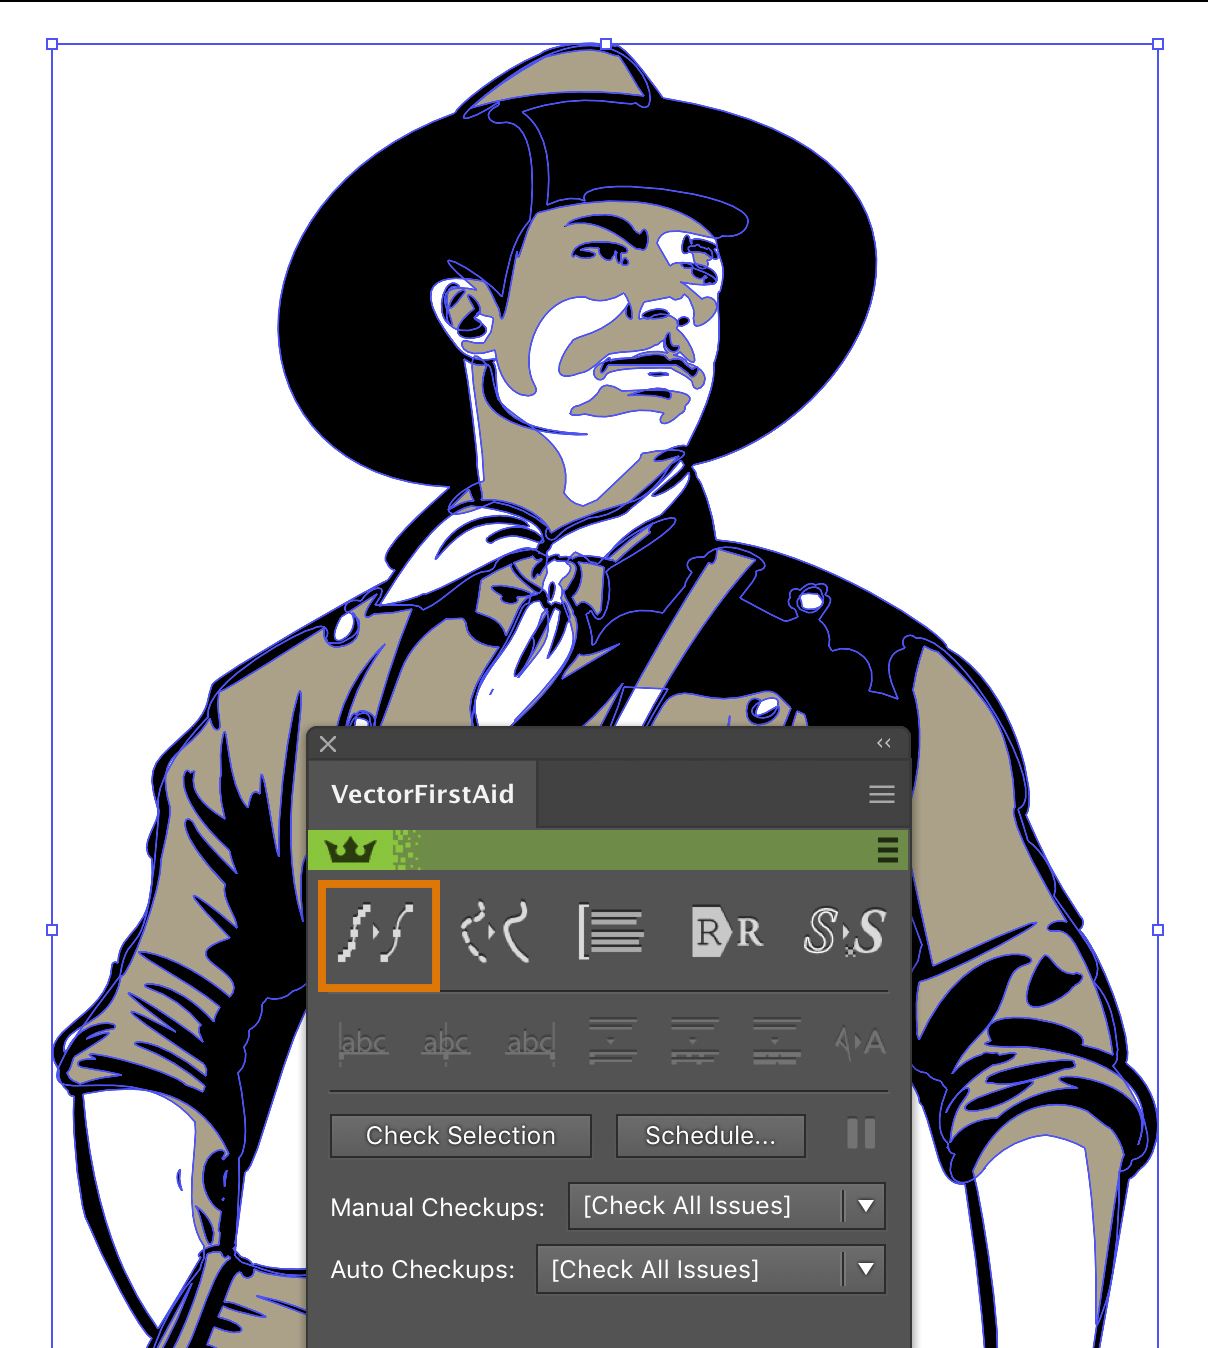
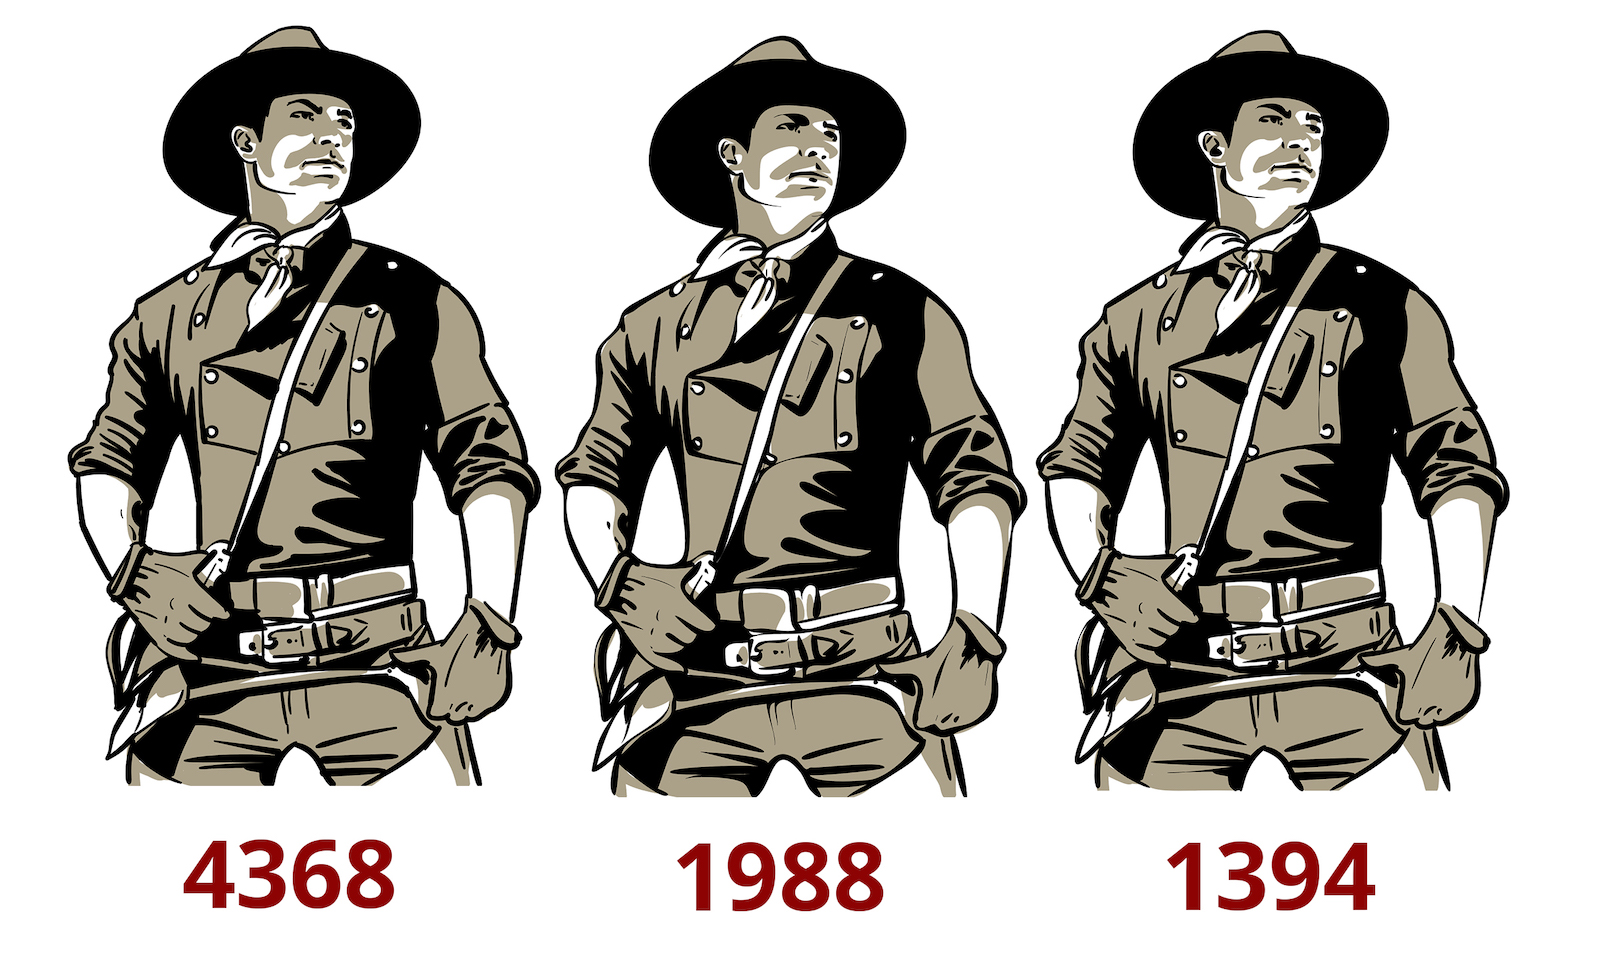
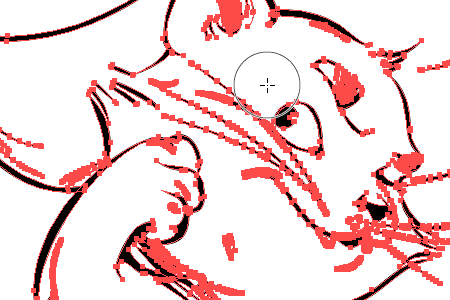
Here you can see how VectorFirstAid produces a higher quality end result compared to the native Simplify feature.
POINT REMOVAL QUALITY COMPARISON | ORIGINAL / SIMPLIFY / VECTORFIRSTAID
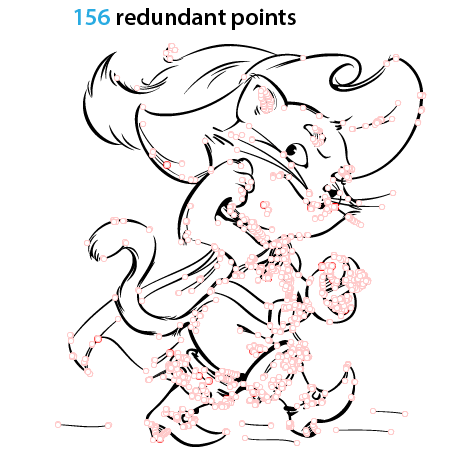
But when it comes to accuracy, such as removing excess points of vector outlines, it may be better to use theSmart Remove Brush Tool (VectorScribe). This tool allows you to literally sweep excess points away like a broom! You can even use the pressure sensitivity of your tablet to control the tolerance.
It also allowsVectorScribe to highlight and automatically remove redundant points from selected paths. Both of these options are available inPathScribe Preferences dialog box. This artwork which we experimented with contained 156 redundant points.
7. Reducing Width Markers
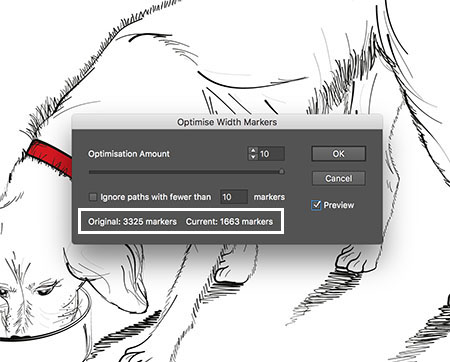
Using uniform path and variable width path inWidth Brush ToolorWidth Gradient Tool (WidthScribe plugin) can lead to the formation of a large number of width markers. Their excessive amount increases the file size and slows down the application during editing and zooming of the screen. We can automatically reduce the amount using theOptimise Width Markers feature of WidthScribe plugin (Object > Path > Optimise Width Markers). The shape of paths will not change significantly.
TheWidth Eraser Tool (WidthScribe plugin) is intended to manually remove the extra width markers.
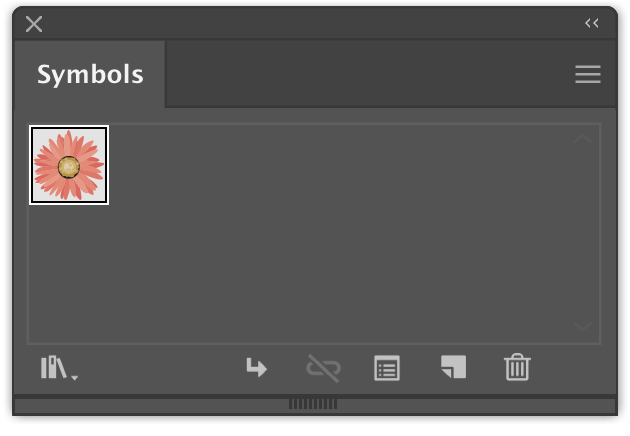
8. Using Symbols
Vector artworks can contain multiple objects or groups of objects resulting from duplication. In this case, save the item that you want to duplicate as a symbol in the Symbols panel (Window > Symbols). Then proceed to the duplication character, for example, using theSymbol Sprayer Tool. Using symbols greatly reduce the size of the original file. Their use is particularly justified if you want to duplicate complex objects.

9. Minimizing the number of steps of Blend objects
Large number of specified steps of blend objects can result in a giant file size. To reduce the steps to select the blend, go toObject > Blend > Blend Options or just double click on theBlend Toolicon in the Tools panel. Pick the number of steps in theBlend Tool Option dialog box, which does not lead to a significant decline in the quality of the object blend.
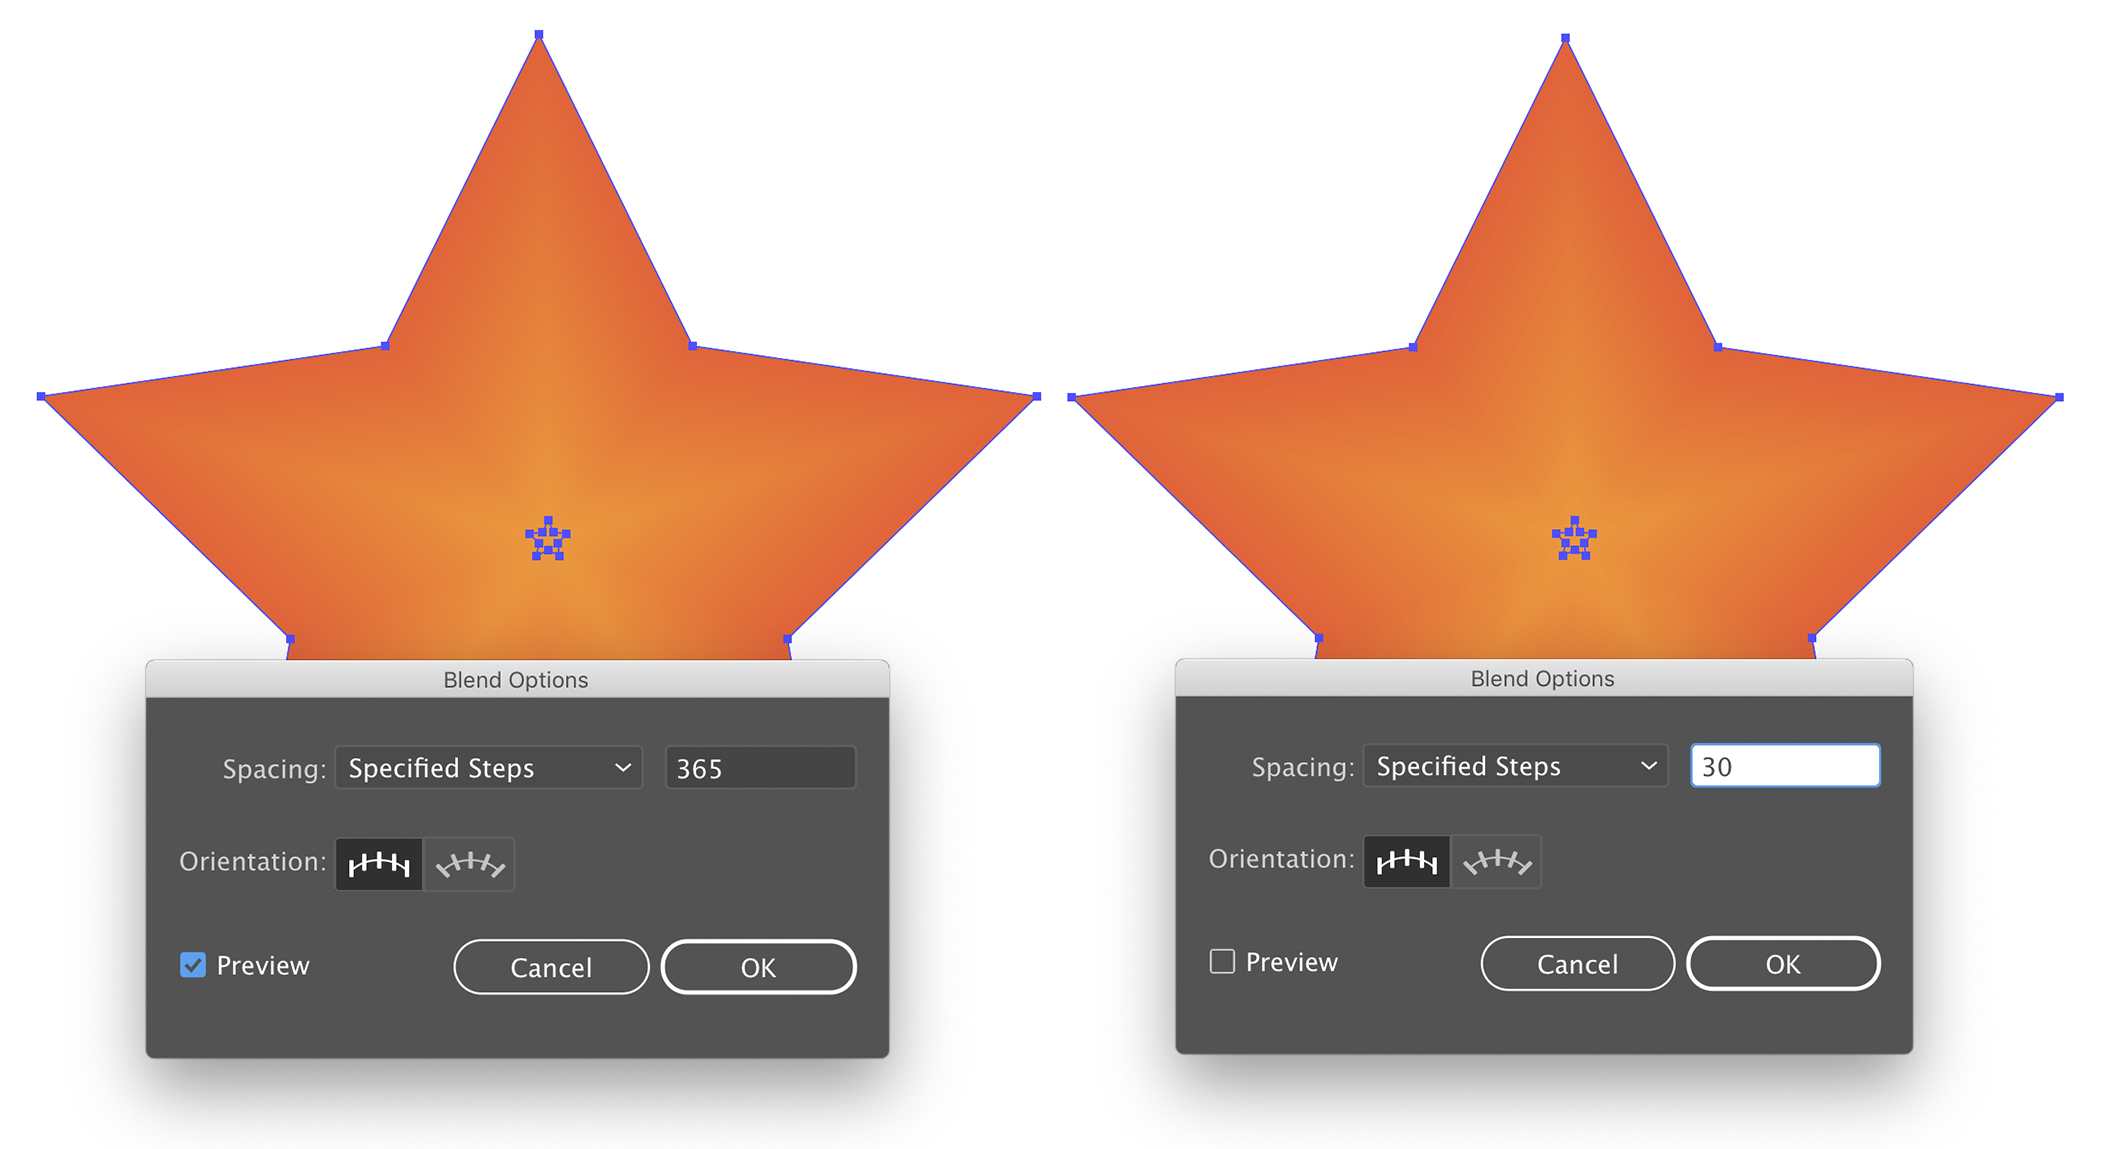
While working on a few complex blend objects you can set 1-3 specified steps, then restore the desired value when your artwork will be completely ready. This trick will speed up your workflow without creating long pauses while saving and zooming.
Source: https://astutegraphics.com/learn/tutorial/9-ways-to-minimize-file-size-in-illustrator
0 Response to "Easy Way to Add Brush to Multiple Objects Illustrator"
Post a Comment